Lincoln Nautilus: Climate Control System - General Information / Center Registers. Removal and Installation
Special Tool(s) /
General Equipment
Removal
NOTE:
Removal steps in this procedure may contain installation details.
-
Release the clips and remove the information display trim panel.
Use the General Equipment: Interior Trim Remover
-
Remove the bolts and the information dispaly unit.
-
Disconnect the electrical connector.
Torque:
12 lb.in (1.3 Nm)
-
Release the clips and remove the lower center instrument panel trim panel.
Use the General Equipment: Interior Trim Remover
-
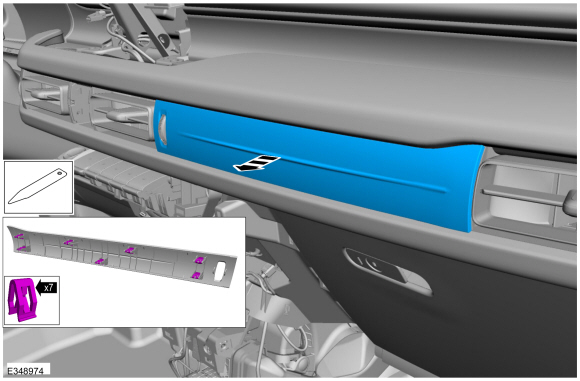
Release the clips and remove the finish panel.
Use the General Equipment: Interior Trim Remover
-
Release the clips and remove the lower RH instrument panel trim panel.
Use the General Equipment: Interior Trim Remover
-
Remove the the switch.
-
Disconnect the electrical connector.
Use the General Equipment: Interior Trim Remover
-
Release the clips and remove the RH instrument panel finish panel.
Use the General Equipment: Interior Trim Remover
-
Remove the bolt, release the clips and remove the RH instrument panel trim panel.
Use the General Equipment: Interior Trim Remover
Torque:
22 lb.in (2.5 Nm)
-
Remove the screws and the center register assemblies.
-
Remove the arm, lift the tabs and separate the register and dampener.
Installation
-
To install, reverse the removal procedure.
Special Tool(s) /
General Equipment
Hose Clamp(s)
Removal
NOTE:
Removal steps in this procedure may contain installation details.
WARNING:
When releasing the cooling system pressure, cover the coolant expansion tank cap with a thick cloth...
Special Tool(s) /
General Equipment
Interior Trim Remover
Removal
NOTE:
Removal steps in this procedure may contain installation details...
Other information:
DTC Chart: DDM
Diagnostics in this manual assume a certain skill level and knowledge of Ford-specific diagnostic practices. REFER to: Diagnostic Methods (100-00 General Information, Description and Operation).
DTC
Description
Action
B1163:11
Left Mirror Heater Output: Circuit Short To Ground
GO to Pinpoint Test D
..
Removal
NOTE:
This procedure can be used for all locations of the component.
Remove the front bumper cover.
Refer to: Front Bumper Cover (501-19 Bumpers, Removal and Installation).
Remove the front parking aid sensor.
Disconnect the front parking aid sensor electrical connector.
Release the tabs.
Remove the front parking aid sensor from ..

.jpg)


 Cabin Heater Coolant Pump - 2.0L EcoBoost (184kW/250PS) – MI4. Removal and Installation
 Climate Control Housing. Removal and Installation
